This is a step by step by step process for creating a new Google Adwords Search Campaign from a master template campaign for Pay-Per-Lead Roofing Markets.
Items of note:
Be sure to download Google Ads Editor as this is the most efficient and thorough way to correctly administer this process. If you do not have the app, just download and install.
You will need access to the Google Ads Geekly Media Admin account, Google@geeklymmedia.com to be able to access the ad accounts.
You will need access to Google Ads Account Geekly Manager account number 810-983-3458 (think of this as the managing account for Geekly Google Ad accounts under management)
Once inside ad account 810-983-3458, you will see and have access to all Google Ad accounts Geekly Media have access to manage, including ad account named Geekly Roofing account number 344-016-0697.
If you do not have the access you need, please ask you direct line manager.
Step 1: Sign into Google Ads Editor and add the Geekly Roofing ad account number 344-016-0697. This is a step you will only have to perform once, as once you have added the desired account, it remains in your Google Ads Editor account until you opt to remove it.
Click on Accounts

Then click on Geekly Media [MCC] (1/31) 810-983-3458
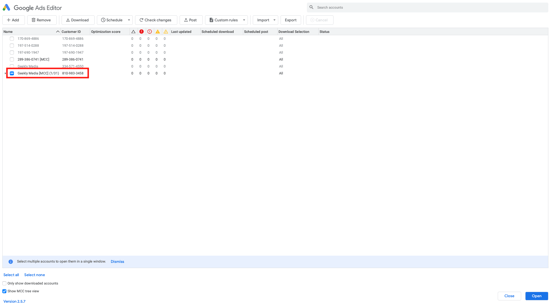
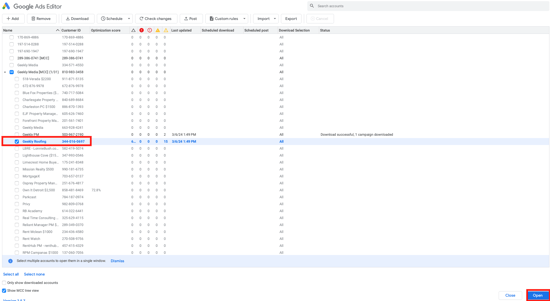
Then select Geekly Roofing 344-016-0697 and then click the blue open button in the lower right corner of the screen.
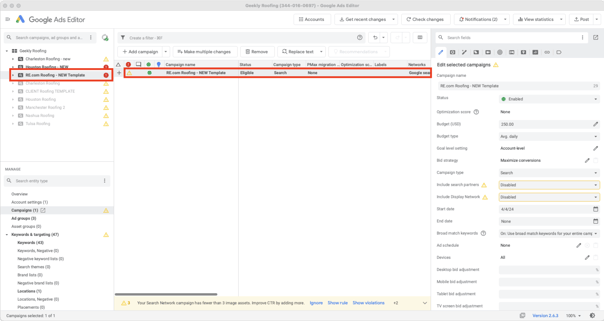
Once you have opened the Geekly Roofing Google Ad account 344-016-0697, you will see the account number displayed at the top of the app screen and when expanded out, you will be able to see all Campaigns associated with this ad account.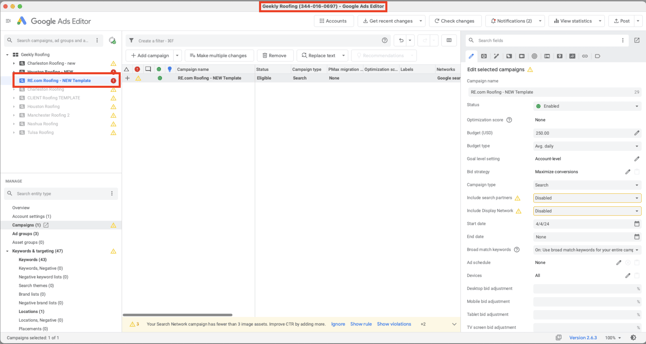
Note: There is a template campaign called RE.com Roofing - NEW Template from which all market are campaigns are created from. This template campaign must not be changed unless by leadership.
Campaigns are created from the RE.com Roofing - New Template for each major market area as clients buy into those markets.
Once customized via this process, each campaign will contain ad groups with keywords and ads targeted specifically for that market.
Step 2: Make a copy of RE.com Roofing - New Template for the new city/market you are creating ads for.
In the top left pane inside Google Ads Editor, click on the RE.com Roofing - NEW Template Campaign. This campaign will appear in the large pane on the right.
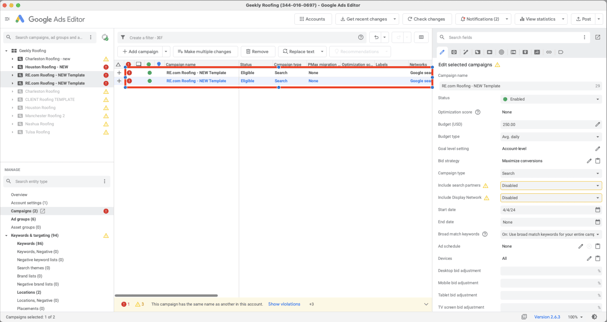
In the large right pane, click on the RE.com Roofing - New Template to highlight it, then copy and paste it so you have two exact copies of the template campaign.
Click on the new copy, and rename it as the city/market you are creating ads for.
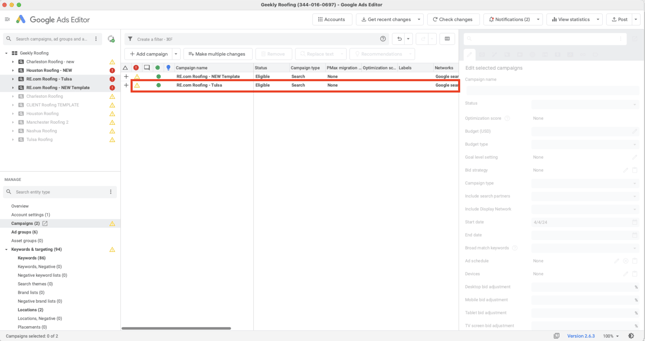
In the left upper pane, click on the new city/market campaign you have created so it is the only campaign you see in the right side large pane.
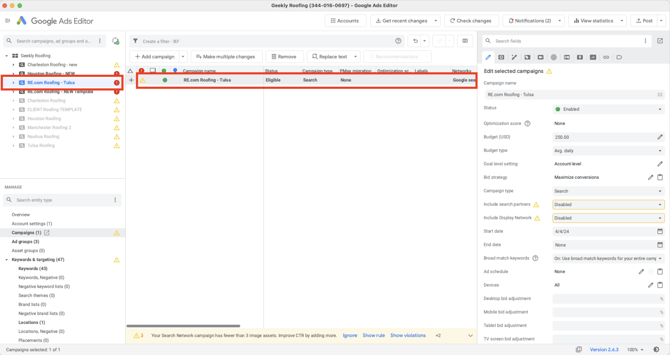
Step 3: Customize your new city/market campaign
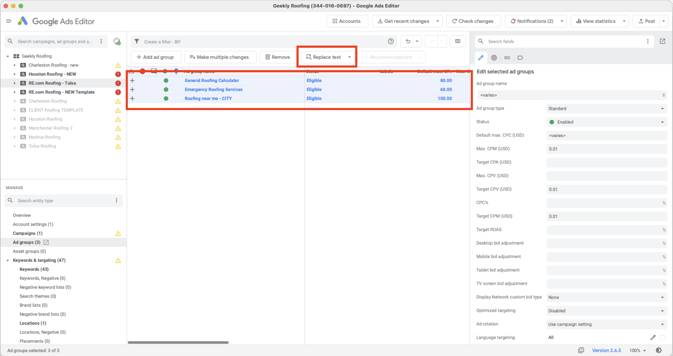
Customize Ad Groups: In the lower left Manage panel of Google Adwords, click Ad group (3). In the large right side panel you will see the (3) ads included with this campaign.

Next, do a command A to select all campaigns, and then click on the Replace Text button on the menu bar.
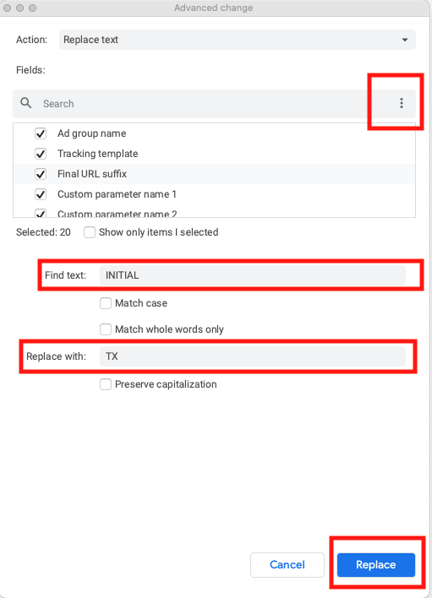
In the Replace text popup, click on the (3) dots at the end of the search bar and choose Select All.
In the Find text field type INITIAL
In the Replace with field type TX
This action finds all instances of the word INITIAL in the Ad Groups and replaces it with TX (or the initials of any state your are creating ads for). If creating ads for a a market in Michigan, you would replace INITIAL with MI.
Then click replace.
You will repeat this same process for:
Find text: CITY
Replace text: Houston (or for whichever city your are creating ads for)
AND
Find Text: STATE
Replace text: Texas (or whichever state you are creating ads for.
Step 4: Customize Keywords & Targeting
In the lower left small Manage pane, click on Keywords & targeting. You will see the list of keywords in this campaign displayed in the large right pane.
Just as you did above for Ad Groups, do a Command A to select all the keywords, then select replace text again.

In the Replace text popup, you will repeat the same three steps as you did for Ad Groups.
1. Find text: INITIAL
Replace text: TX (or the state you are creating ads for)
2. Find text: CITY
Replace text: Houston (or the state you are creating ads for)
3. Find text: STATE
Replace text: Texas (or the state you are creating ads for)
Each time you must remember to click on the 3 dots at the end of the search bar and click select all.
Once this step is completed, you will have updated all Keywords to be customized to the city, state and state initials you are creating ads for.
Step 5: Locations
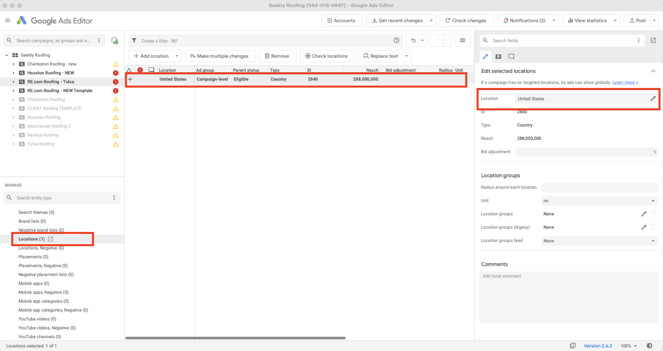
Scroll down in the lower left Manage pane and click on Locations (1)
You will see the campaign only has one location entry that has been set to default to United States.
On the right side large panel, click on the Location entry to select it.
In the Edit panel on the right, click on the pencil next to Location.
New window will pop up where you will search for the location you are creating ads for.
Type in the location you are creating ads for and click Find location.
Then select your desired location and click ok.

Step 6: Audience Segments
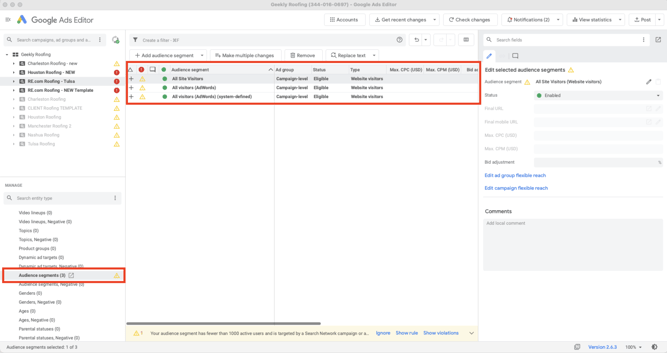
Scrolling further down in the left lower Manage pane, locate Audience Segments (3)
Validate there are three as shown:
All Site Visitors
All Visitors (AdWords)
All Visitors (AdWords) (system-defined)
NOTE: One the campaign has been posted to Google Ads, you will need to create a 4th Audience Segment using the client provided client list.
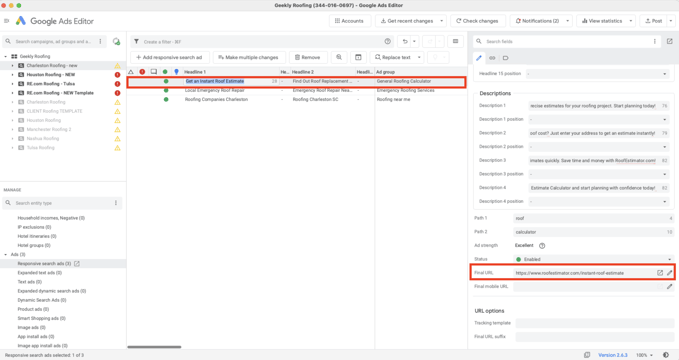
Step 7: Ads
There are currently (3) ads associated with this template. In this step, you will again use the Replace Text process to replace city, initial, and state with the correct information for the market you are creating ads for.
Do a Command A to select all three Ads, click on Replace text. In the Replace text pop up window, remember to click on the 3 dots at the end of the search field to select all and then:
1. Find text: INITIAL
Replace text: TX (or the state you are creating ads for)
2. Find text: CITY
Replace text: Houston (or the state you are creating ads for)
3. Find text: STATE
Replace text: Texas (or the state you are creating ads for)
Each time you must remember to click on the 3 dots at the end of the search bar and click select all.
Once this step is completed, you will have updated all Ads to be customized to the city, state and state initials you are creating ads for.

Each ad will need an updated Final URL. [insert sample URLS]
Get an Instant Roof Estimate page: https://www.roofestimator.com/instant-roof-estimate
Local Emergency Roof Repair page: https://www.roofestimator.com/emergency-roof-repair
Roofing Companies CITY: https://www.roofestimator.com/charleston-roofing-near-me
To update, click on the ad you need to add a Final URL to, then paste the URL into the Final URL field.